Last updated: August 20, 2026
Painting an aluminum boat is one of the few jobs where the paint you choose matters less than what you do before it. Aluminum grows a thin oxide layer within minutes of being cleaned, and paint applied over that layer sits on top of something that is already letting go. That is why so many jon boat repaints peel in sheets after one season while a neighbor’s identical boat still looks good after five.
The difference is almost always preparation and primer. This guide walks through the sequence that holds: cleaning, dulling the surface, priming while the aluminum is still fresh, then a topcoat suited to how the boat is used. It is written for a trailered jon boat or a small aluminum runabout.
This article contains affiliate links. If you buy through them, we may earn a commission at no extra cost to you. Learn more.
Quick Answer
What paint sticks to an aluminum boat?
- Any marine topcoat will stick if the aluminum is clean, dulled and primed with a self-etching or aluminum-specific primer.
- Vinyl and enamel type paints made for aluminum boats can go on with minimal priming, but only over properly prepared metal.
- Skip the primer step on bare aluminum and the job peels, regardless of how good the topcoat is.
- Two thin coats always outlast one thick coat, and recoat windows on the can are there for a reason.
Bottom line: preparation decides how long the paint lasts, the brand on the can decides how it looks.
Why Paint Peels Off Aluminum
Aluminum forms an oxide film on contact with air, and that film is what paint actually bonds to if you have not treated the surface. It is thin, powdery and not strongly attached to the metal below, so a coating stuck to it peels away in sheets as soon as flex, water or UV gets to work on the edges.
Everything in the preparation stage exists to defeat that. Cleaning removes oil, wax and old chalk. Abrading gives the surface a mechanical key. Etching or priming quickly, while the metal is fresh, puts a coating down before a new oxide layer can build. Miss any of those and you are painting onto a surface that was never going to hold.
Step One: Strip and Clean
Remove old flaking paint back to sound material, either mechanically or with a stripper rated for aluminum. Then wash the entire hull with an aluminum boat cleaner to lift oxidation, waterline stains and the road film that a trailered boat collects, and follow with a solvent wipe or a dewaxing cleaner to take off anything oily.
Do not skip the degreasing wipe because the hull looks clean. Fingerprints, old wax, silicone from a detailing spray and outboard exhaust residue are all invisible and all fatal to adhesion. Our aluminum boat cleaner guide covers what works on oxidized hulls and pontoon aluminum.
Rivets, Seams and Old Sealant
Deal with leaking rivets and failed seam sealant before painting. Paint bridging a weeping seam looks fine on day one and cracks along the line by midsummer. Any sealing should be fully cured before primer goes over it, and the sealant’s instructions will say whether it can be painted at all.
Step Two: Abrade the Surface
Scuff the whole area to a uniform dull finish with abrasive pads or sandpaper in the grit range the paint manufacturer specifies. The goal is not to remove metal, it is to kill every remaining bit of gloss and give the primer a texture to grip. Any shiny patch left behind is a future peel point.
Work in a consistent direction and check the surface in raking light, because gloss hides in the hollows between rivet lines and around chines. Vacuum and wipe the dust off afterward with the solvent the paint system recommends, and keep bare hands off the prepared metal from that point on.
Step Three: Prime While It Is Fresh
Prime the same day you abrade, ideally within a few hours. Self-etching primers are the common choice on bare aluminum because they chemically bite into the metal as well as sticking to it, and aluminum-specific marine primers do a similar job in a marine system. Follow the manufacturer’s stated dry and recoat times rather than judging by touch.
Some paints sold specifically as aluminum boat paint state that they adhere directly to properly prepared aluminum without a separate primer. That claim is only as good as the preparation behind it, so read the can carefully. If the instructions describe a preparation step you have not done, the self-priming claim does not apply to your hull.
Step Four: Topcoat Choice
For a trailered aluminum boat, a single-part marine enamel or a vinyl-based aluminum boat paint is the practical choice: easy to apply with a roller or a sprayer, easy to touch up, and forgiving of a driveway rather than a spray booth. Brands like Duralux and TotalBoat sell topcoats aimed specifically at aluminum boats and are widely available.
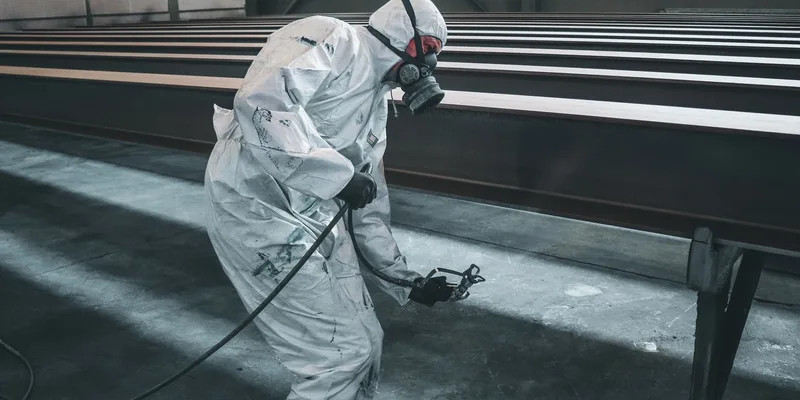
Two-part polyurethane systems give a harder, glossier finish, at the cost of a stricter process, real respiratory protection and no realistic touch-up. They suit a boat you want looking showroom fresh, less so a duck boat that will meet stumps.
Camouflage and Textured Finishes
Flat camo and textured nonskid finishes go over the same preparation and primer, and the flat sheen hides hull imperfections better than gloss does. Confirm the topcoat and primer belong to a compatible system before mixing brands.
What to Have Ready
Cleaning and Etching the Bare Metal
An aluminum-specific cleaner and restorer removes the oxidation and staining that ordinary boat soap leaves behind, which is the starting point for everything else. Pontoon owners will recognize the same product from tube cleaning duty.

The Primer That Makes It Stick
A self-etching or aluminum-rated marine primer is the step that decides whether this is a five-year job or a one-season job. Buy enough to do the whole hull in one session so you are not matching batches halfway around the boat.

The Topcoat
Marine enamels sold for aluminum boats cover jon boats, duck boats and small runabouts with a finish that can be touched up after a hard season. Match the sheen to the use: gloss for a lake boat, flat or camo for hunting.

The Sequence at a Glance
Read this top to bottom before you buy anything, since the products in each row need to belong to a compatible system. Timing between the middle two rows is where most repaints are won or lost.
| Step | What you do | Why it matters | Common mistake |
|---|---|---|---|
| Strip and clean | Remove loose paint, wash, degrease | Oil and wax block adhesion | Skipping the solvent wipe |
| Abrade | Scuff to a uniform dull surface | Gives primer a mechanical key | Leaving shiny patches |
| Prime | Etching or aluminum-rated primer, same day | Beats the new oxide layer | Waiting a week after sanding |
| Topcoat | Two thin coats within the recoat window | Even film, no runs, better cure | One heavy coat in the sun |
Conditions and Timing
Paint in the shade, out of the wind, with temperature and humidity inside the range printed on the can. Hot metal makes paint flash off before it levels, and a cold night can leave a coat soft for days. Check the forecast for the full cure window, not just the hours you are painting.
Respect the recoat window. Many marine coatings want the next coat either within a stated number of hours or after a light sand once fully cured, and recoating outside that window causes wrinkling. The instructions on the can beat any general advice.
Below the Waterline Is a Different Question
If the boat stays in the water, antifouling below the waterline is a separate system with its own rules, and many antifouling paints are unsuitable for aluminum because of galvanic issues. Check the paint manufacturer’s guidance for aluminum hulls, and see our bottom paint guide.
Frequently Asked Questions
Do I need primer on an aluminum boat? Almost always. Bare aluminum forms an oxide film that paint cannot grip reliably, and a self-etching or aluminum-rated primer solves that. Some products claim direct adhesion to prepared aluminum, so read the can and follow its preparation steps exactly.
Can I use regular spray paint on a jon boat? It will go on and it will not last. General purpose spray paints are not formulated for the flexing, UV and constant wetting an aluminum hull sees, and they have no etching action on the metal. Marine aluminum paint systems exist for this reason.
How do I prepare an aluminum boat for paint? Strip loose paint, wash with an aluminum cleaner, degrease with the solvent the paint system specifies, scuff the whole surface to a uniform dull finish, remove all dust, then prime the same day while the metal is fresh.
How many coats of paint does an aluminum boat need? Typically two thin topcoats over primer, applied within the recoat window on the can. Two thin coats level better, cure more evenly and last longer than a single heavy coat that traps solvent underneath.
Can I paint over old peeling boat paint? Only after removing everything that is loose and feathering the edges of what stays. Paint applied over failing coating fails with it, so the sound-versus-loose test is what decides how much stripping the job needs.
Will paint stop my aluminum boat from corroding? A sound coating keeps water off the metal, which helps. A hull kept in the water also has galvanic considerations that a coating alone does not address, so ask a marine technician if you see corrosion around fittings or the transom.
The Bottom Line
Clean it, degrease it, dull it, prime it the same day, then two thin topcoats within the recoat window. Do that and a modest enamel outlasts an expensive topcoat sprayed over a shiny hull. Stay inside one compatible product system and follow the can rather than a forum thread. Read also our aluminum boat cleaner guide for the prep wash, our bottom paint guide for below the waterline, and our pontoon cleaning guide if the aluminum in question is a set of tubes.