Last updated: August 20, 2026
A dock piling in a crosswind, a trailer bunk bracket, a dropped anchor. Gelcoat picks up scratches from things that seemed harmless at the time, and the ones that catch a fingernail cannot be polished out no matter how many passes you make. They have to be filled.
Repair kits sold for exactly this promise a color-matched, invisible fix. The reality is more honest than that: a careful repair on a white hull can disappear at arm’s length, and a repair on a metallic or dark colored hull will usually still be visible if you know where to look. This guide covers what a kit can realistically do, how the process works, and when the job belongs with a professional.
This article contains affiliate links. If you buy through them, we may earn a commission at no extra cost to you. Learn more.
Quick Answer
Can you repair gelcoat scratches yourself?
- Scratches you cannot catch a fingernail in usually polish out with compound, no filling needed.
- Anything deeper needs a gelcoat paste or repair kit that cures hard and can be sanded and polished.
- Color matching is the hard part; white hulls hide a repair best, dark and metallic colors are unforgiving.
- Damage through the gelcoat into the laminate, or anywhere structural, is a job for a professional shop.
Bottom line: fingernail test first, then decide between polishing, a repair kit, and a phone call.
The Fingernail Test Decides the Method
Drag a fingernail across the scratch. If it glides over without catching, the damage sits in the top of the gelcoat and abrasives will remove it, which means compound and polish rather than a repair kit. If the nail drops into the groove, there is material missing and it has to be replaced.
This one test saves most of the wasted effort in gelcoat repair. Owners routinely buy a repair kit for scuffs that a compound would have taken out in ten minutes, and just as often try to polish out a gouge that will never disappear because there is nothing left to level.
Scuffs Versus Scratches
Black rubber marks from a fender or a dock bumper are transfer, not damage. They look alarming and come off with a cleaner or a light compound, and no filling is needed. Check with a wet rag before assuming a mark is a scratch at all.
What Comes in a Gelcoat Repair Kit
A typical kit contains a thickened gelcoat paste, a hardener, a set of tinting pigments, mixing cups and sticks, and a release film that lets the paste cure without air contact. Evercoat is one of the widely available options on the market, and its kit follows that pattern with tinting colors for matching to the hull.
The pigments are the part that matters. Gelcoat cures with a tack-free surface only if it is sealed from air, hence the film, and it will only look right if you built the color before you applied it. Mixing pigment into a small test batch and letting it cure next to the hull is the step that separates a good repair from an obvious patch.
How the Repair Goes
Clean and dewax the area, then open the scratch slightly with a small tool so the groove is a V rather than a knife line, which gives the filler something to hold onto. Mix the gelcoat paste with hardener at the ratio the kit specifies, tint it, and press it in slightly proud of the surface.
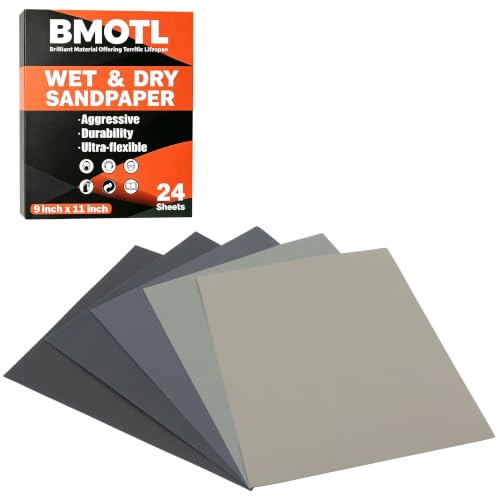
Cover it with the release film to keep air off, let it cure fully, then sand the excess flat working through progressively finer wet grits. Finish with a compound and polish to bring the repaired area back to the gloss of the surrounding hull, which is where our polish and compound guide picks up.
Sanding Is Where Repairs Get Ruined
The instinct is to sand hard and fast, which flattens the surrounding gelcoat as well as the repair and leaves a visible dished area that no polish will hide. Work wet, use a small backing block so the pressure stays over the repair, and check often. It is far easier to sand a little more than to put gelcoat back.
Color Matching Expectations
White hulls forgive the most, because most white gelcoats are close enough that a slight difference reads as a reflection. Off-white and cream shades are the next tier of difficulty, and any dark color, metallic flake or two-tone stripe is where amateur repairs become obvious in direct sunlight.
Older hulls add a second problem: the surrounding gelcoat has faded over years of UV, so even a perfect match to the original factory color will look wrong against it. Matching to the hull as it is today, using a cured test patch rather than a wet sample, is the only way to get close.
What to Buy
Deep Scratches and Gouges in Colored Gelcoat
A full repair kit with tinting pigments and release film is the right tool for damage on a colored or off-white hull. Buy the kit with the pigment set rather than a plain white paste, because the tinting step is what makes the repair blend.

Chips and Nicks on a White Hull
For a plain white boat, a simple white gelcoat paste covers chips around the bow eye, along the keel and at the transom corners without the complication of tinting. Keep a tube with the trailer, since these are the spots that collect fresh damage every launch season.

Finishing the Repair
Wet sanding paper in a range of fine grits plus a compound and polish are what turn a cured lump into an invisible repair. This is the part owners underbuy, and a repair that is 90 percent of the way there usually just needs two more grit steps.
Damage Type and Realistic Outcome
Set expectations before you start. The right-hand column is the honest version of what most owners achieve on a first attempt, working carefully in a driveway.
| Damage | Method | Difficulty | Realistic result |
|---|---|---|---|
| Scuff or transfer mark | Cleaner or light compound | Easy | Disappears completely |
| Fine scratch, nail does not catch | Compound then polish | Easy | Disappears completely |
| Deep scratch or chip, white hull | Gelcoat paste, sand, polish | Moderate | Invisible at arm’s length |
| Deep scratch, dark or metallic hull | Tinted kit, sand, polish | Hard | Improved, often still findable |
When to Call a Professional
Stop and get a shop involved if the damage goes through the gelcoat into the fiberglass laminate underneath, if you can see fibers or a soft spot, if the area is near a through-hull or a structural bulkhead, or if the crack radiates outward in a spider pattern that suggests an impact rather than a scrape.
Star cracks and spider cracking in particular are often a symptom rather than the problem. Filling them cosmetically without understanding why the gelcoat is flexing there means they come back, and on some parts of a hull that flex is worth having someone qualified look at before the season starts.
Safety and Ventilation
Gelcoat and its hardener are chemicals with real handling requirements. Work outdoors or with strong ventilation, wear gloves and eye protection, follow the mixing ratios on the kit rather than eyeballing them, and read the manufacturer’s safety information before opening anything.
Frequently Asked Questions
Can deep scratches be removed from a boat? Removed, no; filled and blended, yes. Anything you can catch a fingernail in needs gelcoat paste rather than an abrasive, then careful wet sanding and polishing to level and gloss the repair.
How do I match gelcoat color? Use a kit with tinting pigments, mix a small test batch, and let it cure next to the hull before judging the match, because gelcoat changes shade as it cures. On a faded older hull, match to the current color rather than the factory one.
Will a gelcoat repair be invisible? On a white hull, usually close to it. On dark, metallic or two-tone finishes, expect a noticeable improvement rather than a disappearance, since those colors show any difference in shade or texture.
Can I use car body filler on gelcoat? Automotive filler is not a substitute for gelcoat on a surface that stays wet and sees UV, and it needs a topcoat over it. Gelcoat paste made for marine repair cures to a hard, water-resistant finished surface that can be sanded and polished directly.
Do I need to wax after a gelcoat repair? Yes, once the repair has been polished. Freshly worked gelcoat is bare and will begin oxidizing and picking up stains, so protecting it the same day preserves the result.
How long does gelcoat take to cure? It depends on the product, the hardener ratio and the temperature, and the kit instructions will state it. Curing under release film, away from air, is what allows the surface to harden properly rather than staying tacky.
The Bottom Line
Test with a fingernail, polish what you can, and reserve the repair kit for real gouges. Tint a test batch before committing, seal the repair with release film, and sand wet with a block so you do not dish the surrounding gelcoat. Damage into the laminate belongs with a professional. Read also our polish and compound guide for the finishing steps, our boat wax guide for protecting the repair, and our marine sealant guide for the hardware jobs nearby.